Refroidissement Jetta/Golf MK5 MK6 : Comment remplacer grille aération 1KD819203A, optimisation climatisation Grille d'aération centrale VW Golf/Jetta : Installation grille clim 1KD819203A, flux air optimisé Problèmes climatisation VW Golf 5/6 : Remède grille 1KD819203A, ventilation défectueuse 1KD819203A remplacement : Tutoriel grille aération Jetta/Golf, pièces détachées climatiseur Climatisation Jetta/Golf MK5/MK6 : Amélioration grille d'aération, air conditionné faible Grille aération tableau de bord VW : Démontage et remplacement 1KD819203A, soufflerie bloquée VW Golf 5/6 : Changer grille aération centrale, compatibilité 1KD819203A, pièces OEM Jetta MK5 MK6 climatisation : Guide remplacement grille aération, chauffage inefficace 1KD819203A et climatisation : Conseils remplacement grille, dysfonctionnement ventilation Grille aération VW Golf/Jetta : Symptômes panne, diagnostic grille 1KD819203A, entretien clim Climatisation faible Jetta/Golf : Solution grille 1KD819203A, orientation flux air Remplacement grille aération MK5/MK6 : Airbag passager, démontage tableau de bord, outils Optimiser climatisation Golf/Jetta : Qualité air, filtre habitacle, désembuage pare-brise 1KD819203A : Dimensions grille aération, pièce neuve ou occasion, prix remplacement VW Golf 5/6 : Problèmes ventilation, odeur climatisation, nettoyage conduits, diagnostic panne
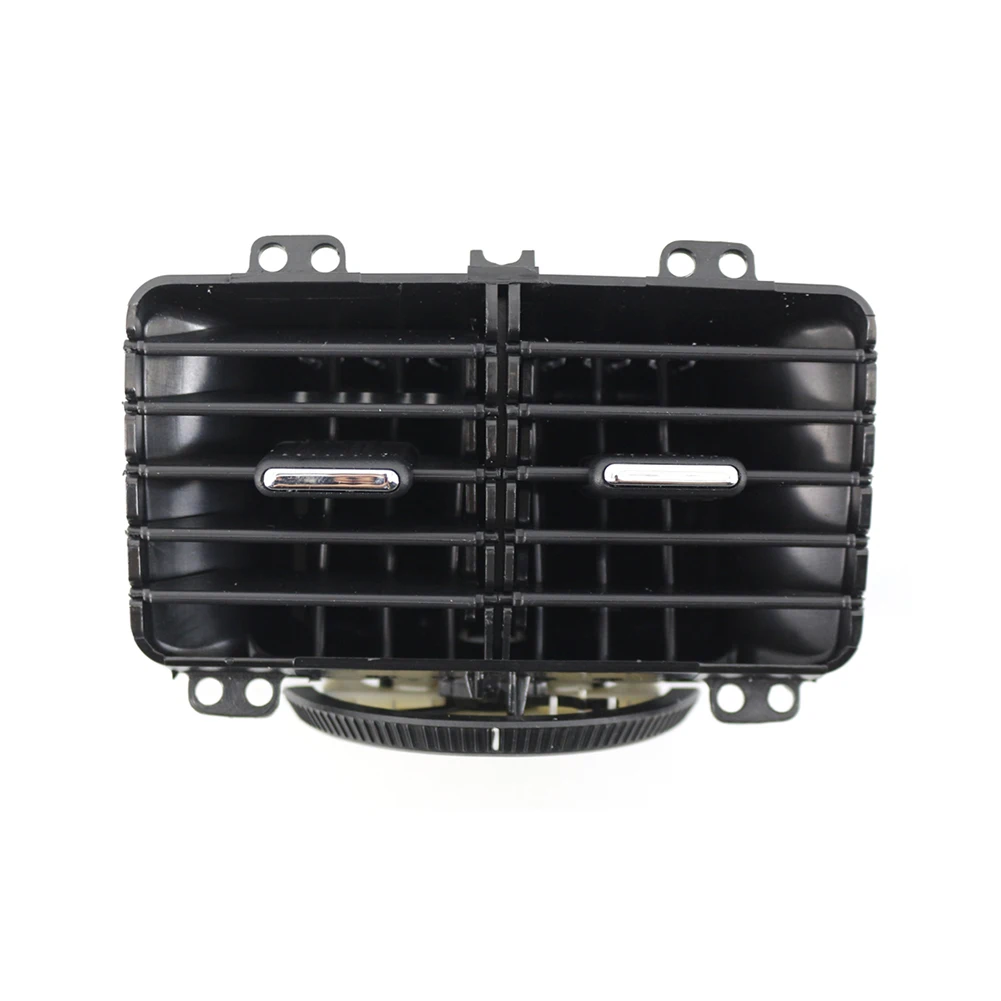
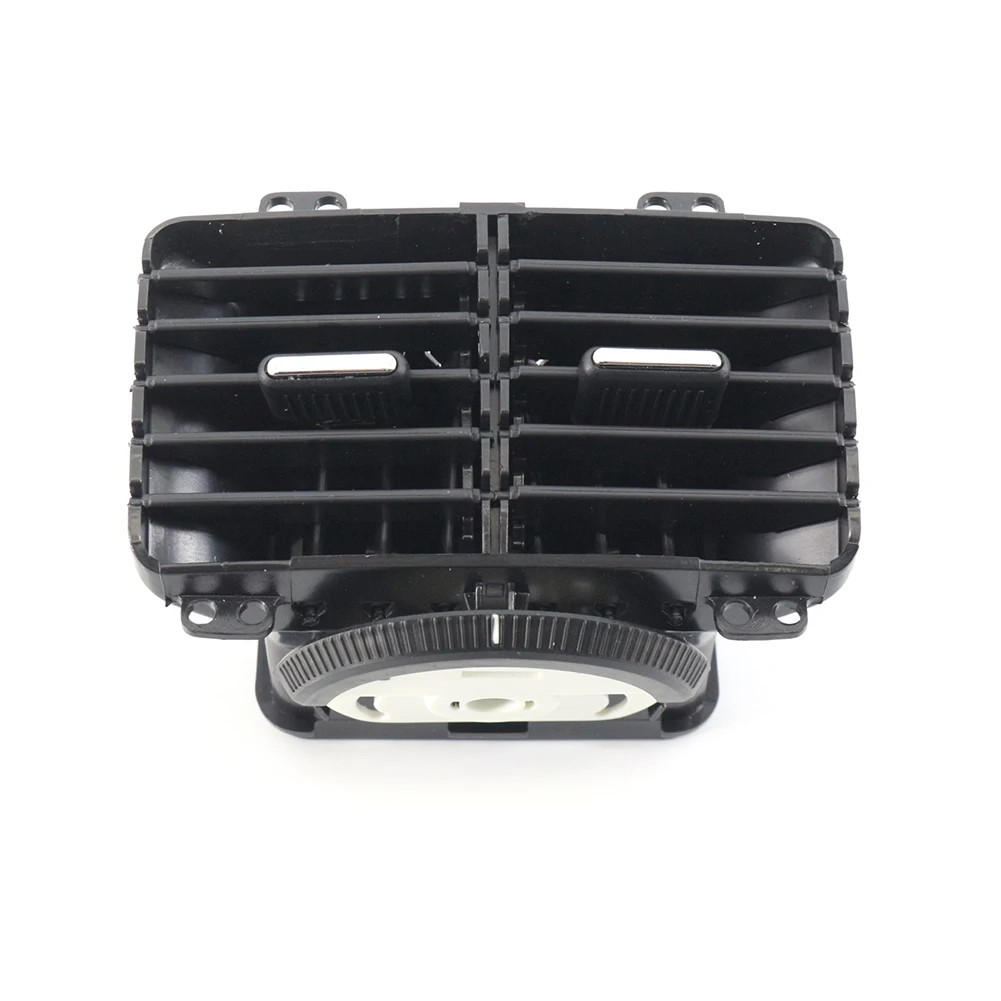
🔥 VW Jetta/Golf MK5/MK6 Climatisation : Remplacez votre Grille d'Aération 1KD819203A ! 🔥
Alerte Vol ! Faux-voyant solaire ultra-réaliste : Voleurs STOP !🔥VW Jetta/Golf MK5/MK6 Climatisation: That Dang Air Vent! (And Why You Should Care!)🔥
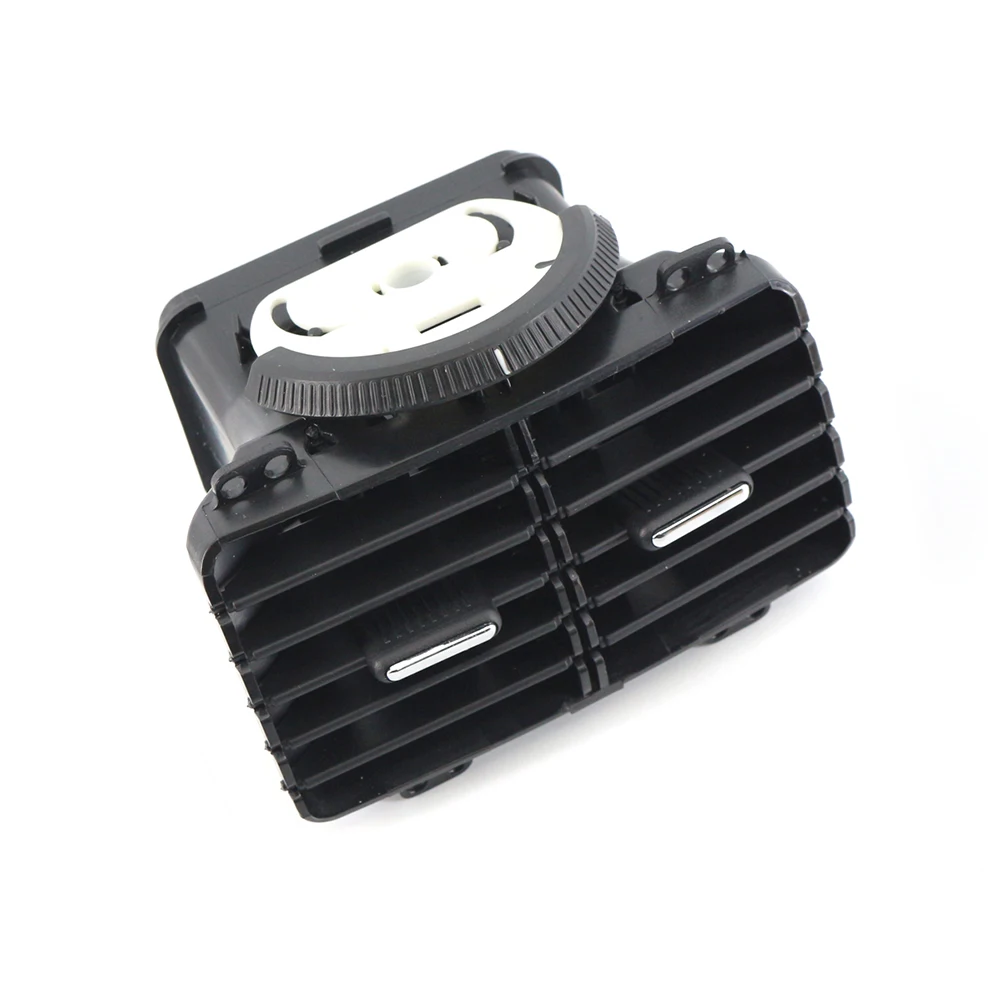
Alright, let's talk about something vitally important to the sanity of any VW Jetta or Golf MK5/MK6 owner: the freakin' air vent! Specifically, the driver's side one, the one that’s probably hanging by a thread, spitting dust bunnies on your dashboard like a sarcastic comedian. We’re talking the infamous 1KD819203A – the part number that’s probably burned into your brain by now.
H2: The Pre-Vent Predicament: Why Is My Air Vent Trying to Escape?!
Seriously, what is it with these things? I swear, the plastic used to make these vents is more brittle than a week-old biscotti. You barely look at it wrong, and BAM! Little plastic shards raining down, like a miniature, automotive apocalypse.
H3: The Symptoms: Oh, the Joy of a Crap Air Vent
- The Flappy Thing Blues: That horizontal slat thingy… it’s probably drooping like a sad puppy's ear. Won't stay in place? Good luck directing air anywhere useful!
- The Loosey-Goosey Wobble: Mine used to rattle like a maraca filled with angry bees. Every bump, every turn? Rattle, rattle, rattle! Drove me nuts.
- The Zero Control Zone: Forget trying to direct the air. You can aim it at the windshield, the floor, or your face… or nowhere at all! Air simply escapes in a general direction of "somewhere."
- The Dust Devil Dance: Tiny dust motes circulating? Welcome to the club! The vent's internal structure has probably become a fine layer of debris from years of use…
H3: My Personal Vent-Venting Story - The Day the Vent Died (Again!)
Okay, here's my confession. I knew this vent was on its last legs. I'd glued it, taped it, cursed at it… you name it. I'd even considered sacrificing a virgin to the VW god of vents. (Don't judge me; desperation breeds crazy ideas!)
One particularly hot summer day, I was stuck in gridlock on the freeway. The AC was blowing, but like… kinda blowing. Then, BAM! I hit a bump. My face, the thing took flight. The whole dang vent just exploded. Shards of plastic went EVERYWHERE. I mean, it was impressive in a "holy crap, I'm now duct-taping a makeshift air nozzle together in the middle of rush hour" kinda way. My wife, in the passenger seat, just pointed and started laughing. (Women, am I right?)
H2: The Solution: Replacing the 1KD819203A Air Vent - Easier Than You Think (Probably…)
Alright, after the carnage, it was time to face reality. I had to replace the blasted thing. And you know what? It's actually not that hard!
H3: The Good News: You're Not a Rocket Scientist
Seriously, you don't need a PhD in car mechanics. This is a relatively straightforward job. You can do this! Trust me, if I can do it, anyone can.
H3: The Shopping List (and My Gripes About Prices!)
- The 1KD819203A Air Vent: Obviously. Shop around! Prices can vary wildly. I remember balking at the price. Paying anywhere near the suggested retail price is robbery! (Okay, maybe not robbery, but you get the idea.)
- A Trim Removal Tool Kit (Optional but Recommended): These plastic tools are your best friend. They prevent you from scratching your dashboard and make the whole process so much easier. A set of these is crucial.
- A Torx Screwdriver: You might need to remove a screw or two. Make sure you have the right size.
H3: The Step-by-Step (My Way, Which May or May Not Be the "Correct" Way)
Okay, here's how I did it. Disclaimer: I am not a professional mechanic. If you break your car… well, that's on you, pal!
- Preparation is Key: Turn off the car, remove the key, and maybe disconnect the negative battery terminal. Safety first, kids! (I might or might not have skipped this step. I tend to live dangerously. Don't be like me.)
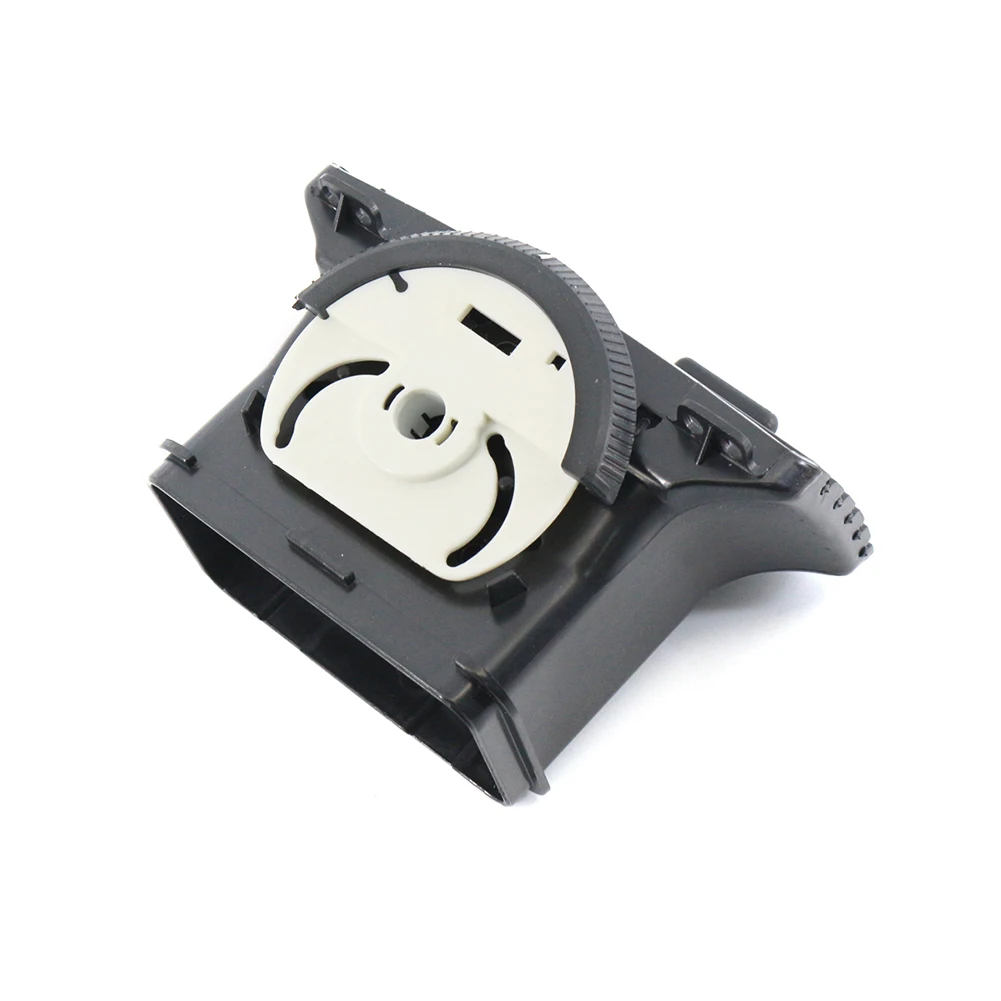
- Gently Pry: This is where the trim removal tools come in handy. Carefully pry around the edges of the old vent. It should pop out, maybe with a little bit of grumbling.
- Detach the Connector (If Applicable): Some vents have a small connector for the hazard lights button. Unplug it. Very carefully. These connectors can be super-fragile.
- Remove the Old Vent: Pull out the old, busted vent. Admire the carnage. Revel in the plastic-y goodness of your freedom.
- Install the New Vent: Line up the new vent. Push. Push hard. You should hear a satisfying "click" (or several… I had to wiggle the new part a bit).
- Reattach the Connector (If Applicable): Plug the connector back in.
- Test and Celebrate: Turn on the car and see if the air flows correctly. If it does, congratulations! You're now a vent-replacement champion! If not… well, at least you tried. And hey, if you mess it up, refer to my story, the car is totaled.
H2: The Aftermath: Blissful Airflow and the Joy of a Functional Vent!
Ah, the sweet, sweet feeling of cool air blasting (or gently wafting, depending on how you set it) exactly where you want it. It’s a game-changer!
H3: My Verdict: Worth Every Penny!
Seriously, replacing that air vent was one of the best things I've done for my sanity. The constant rattling and the zero air direction had been driving me bonkers. Now? Smooth sailing (or, well, smooth airflow)!
H3: Potential Problems (and How to Avoid Them)
- Breaking the Dashboard Clips: Be gentle! Those clips can be brittle. Work slowly and carefully.
- Scratching Your Dashboard: Again, that trim removal tool kit is your BFF.
- Buying a Shitty Replacement: Some aftermarket vents are… well, shitty. Do your research! Read reviews! Make sure you're getting a decent quality part.
H2: Final Thoughts: Embrace the Vent!
Look, it's just an air vent. But in the grand scheme of things, it's a microcosm of car ownership. Dealing with the little frustrations and fixing them yourself. It's satisfying. It's empowering. And it saves you money! Plus, you can finally say goodbye to those dust bunnies!
So, go forth and replace that 1KD819203A! You'll thank me later. Your face will thank me later. Your car's interior will thank me later. And your sanity? Well, it'll at least be a tiny bit less frayed. Now go get 'em!
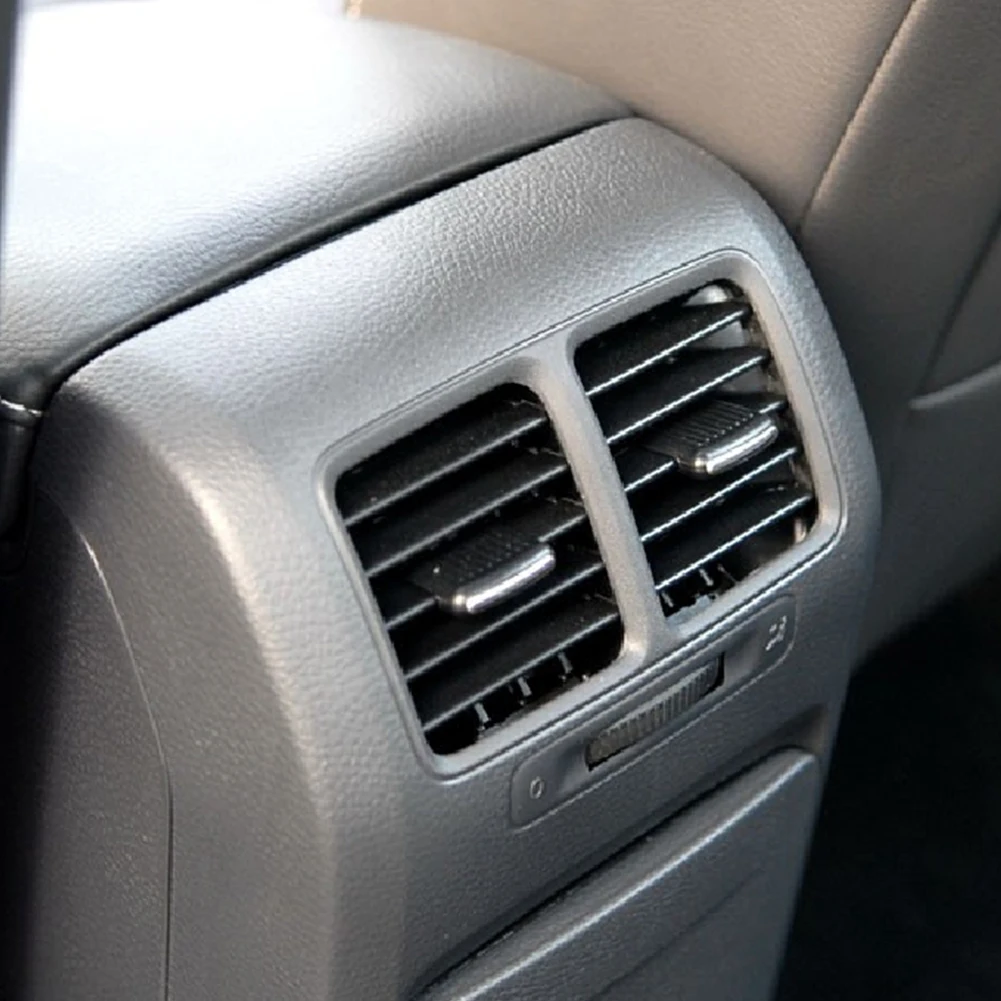
Pourquoi est-ce que je dois remplacer cette fichue grille d'aération ? Elle a l'air... en bon état, non ?
Ah, le classique ! C'est comme dire "ma grand-mère a l'air bien pour son âge" – ça veut dire qu'elle est en lambeaux, mais on ne veut pas l'admettre. Sérieusement, cette grille, c'est le point focal de l'air frais pour ton char. Des fois, les lamelles se cassent toutes seules (j'ai fait l'expérience, c'est une horreur !). D'autres fois, les clips lâchent comme des vieux boutons de chemise – et paf, la grille se barre en courant, comme un ado fuyant ses responsabilités. Et si tu as des enfants, ou pire, un chien... bon courage. Des miettes, des poils, des objets égarés... tu vas finir avec une jungle dedans. Donc même si elle a l'air "en bon état", crois-moi, elle ne l'est peut-être pas. Prête à te trahir à tout moment.
Okay, d'accord, je suis convaincu. Mais est-ce que c'est difficile à remplacer ? Je suis plus doué pour manger des croissants que pour bricoler...
Écoute, si tu peux utiliser un tournevis et que tu n'as pas deux mains gauches (comme moi quelques fois), tu devrais survivre. Il y a des vidéos sur YouTube qui sont hyper claires, même moi j'ai réussi à le faire plusieurs fois. Surtout, ne force pas comme un bourrin. Prends ton temps, regarde bien comment sont les clips, et ça devrait aller. Si tu casses quelque chose, ne t'inquiète pas, on l'a tous fait. C'est juste un rite de passage. J'ai une anecdote : la première fois, je m'attendais à une bataille épique, avec des outils spéciaux et deux jours de galère. En fait, c'était plus simple que changer une ampoule ! (bon, presque... j'ai quand même mis deux heures, j'avoue... J'ai un peu forcé, c'est vrai. La grille s'est littéralement désintégrée entre mes mains. Mais bon, j'ai appris de mes erreurs... et acheté une nouvelle grille, bien sûr !)
Quel est le modèle de grille exact dont j'ai besoin ? Y'a-t-il des imitations qui vaillent le coup ?
Le numéro magique, c'est le 1KD819203A. C'est lui, le héros. Il existe des imitations, oui. Honnêtement, ça dépend de ton budget. Les grilles d'origine VW sont plus chères, forcément, mais la qualité est souvent meilleure. Les imitations... eh bien, c'est un peu la loterie. Certaines sont parfaites, d'autres... Disons qu'elles se désintègrent plus vite qu'un cookie dans une tasse de café. Lis les avis en ligne, compare les prix, et croise les doigts. J'ai tenté le coup une fois avec une imitation "économique", et... on va dire que j'ai eu ce que j'ai payé. Elle a fini par se barrer en courant pendant que je prenais un virage serré. La classe. Moralité : parfois, vaut mieux dépenser un peu plus pour éviter les ennuis. Après, si tu as envie de jouer, on ne va pas t'en empêcher, hein !
Il y a une différence entre les grilles de gauche, de droite et du milieu ? Et pourquoi les grilles des côtés sont-elles si chères ?
OUI ! C’est hyper important. Les grilles centrales sont généralement identiques, mais les côtés... c'est une autre histoire. Celles de gauche et de droite sont spécifiques, souvent en forme différente (les rainures penchent différemment, en gros). Et oui, elles sont souvent plus chères. Pourquoi ? Mystère. Peut-être qu'elles sont un peu plus difficiles à fabriquer, ou peut-être qu'elles ont une meilleure vue sur des choses plus intéressantes. Tiens, je te raconte la fois où j'ai commandé une grille de gauche au lieu d'une grille centrale, et... c'était la catastrophe. On aurait dit un Picasso qui avait pris feu. Elle ne voulait absolument pas rentrer, et j'ai failli tout casser. J'ai fini par appeler mon mécano et lui dire que je venais de découvrir un nouveau type d'art abstrait avec les voitures. Pas marrant. Moral de l'histoire : vérifie toujours, toujours, le côté de la grille avant de commander, et de préférence deux fois. Et prépare-toi à rire (ou pleurer).
Faut-il enlever le tableau de bord pour installer cette grille ?
Non, heureusement ! Tu n'as pas besoin de tout démonter. C'est une bonne nouvelle, non ? Si tu devais enlever le tableau de bord pour ça, je crois que je vivrais en slip toute ma vie, tellement ça me ferait peur. Elles sont généralement maintenues par des clips. Il faut faire levier avec précaution, en général, avec une spatule en plastique pour ne pas abîmer le tableau de bord. Mais vraiment, pas de panique, le tableau de bord reste en place. Tu n'as pas besoin d'être un magicien de l'automobile.
Après le remplacement, comment nettoyer ces fichues grilles ?
Ha, la question qui tue ! L'éternel problème de la poussière, des miettes, et autres joyeusetés. Personnellement, j'utilise un aspirateur avec une petite brosse (genre, celle pour les claviers d'ordinateur). Sinon, les lingettes pour tableau de bord, ça fonctionne aussi. Mais soyons honnêtes, ce n'est jamais parfait. De temps en temps, je suis tenté de les sortir et de les laver à grande eau, mais j'ai toujours peur de tout flinguer. Donc, aspirateur, lingettes, et un peu de foi. Et prier pour que les enfants arrêtent de manger des gâteaux dans la voiture. C'est un combat perpétuel, crois-moi.