Fuite Injecteur A4 B8 : Réparer Soi-Même (Kit Joints Cuivre)
- Fuite injecteur Audi A4 B8 : Tuto réparation DIY
- Remplacement joints injecteurs A4 B8 : Étape par étape
- Kit joints injecteurs cuivre A4 B8 : Où acheter, prix, comparatif
- Injecteur qui fuit A4 B8 : Symptômes, diagnostic, solutions
- Fuite gasoil injecteur A4 B8 : Odeur, impacts, conséquences
- Joints cuivre injecteur A4 B8 : Montage correct, astuces
- Démontage injecteurs A4 B8 : Outils spécifiques, précautions
- Changement joints injecteurs A4 B8 : Tutoriel complet avec photos
- Fuite injecteur moteur TDI A4 B8 : Causes, prévention
- Nettoyage injecteurs A4 B8 : Produits, méthodes, résultats
- Fuite gasoil sous injecteur A4 B8 : Inspection, réparation facile
- Problème de démarrage A4 B8 : Fuite injecteur, cause possible
- Couple serrage injecteur A4 B8 : Informations techniques, guide
- Kit joints injecteurs cuivre pour Audi A4 B8 : Marques recommandées
- Fuite injecteur A4 B8 : Bruit moteur anormal, fumée noire
- Forum Audi A4 B8 : Discussions, conseils réparation injecteurs
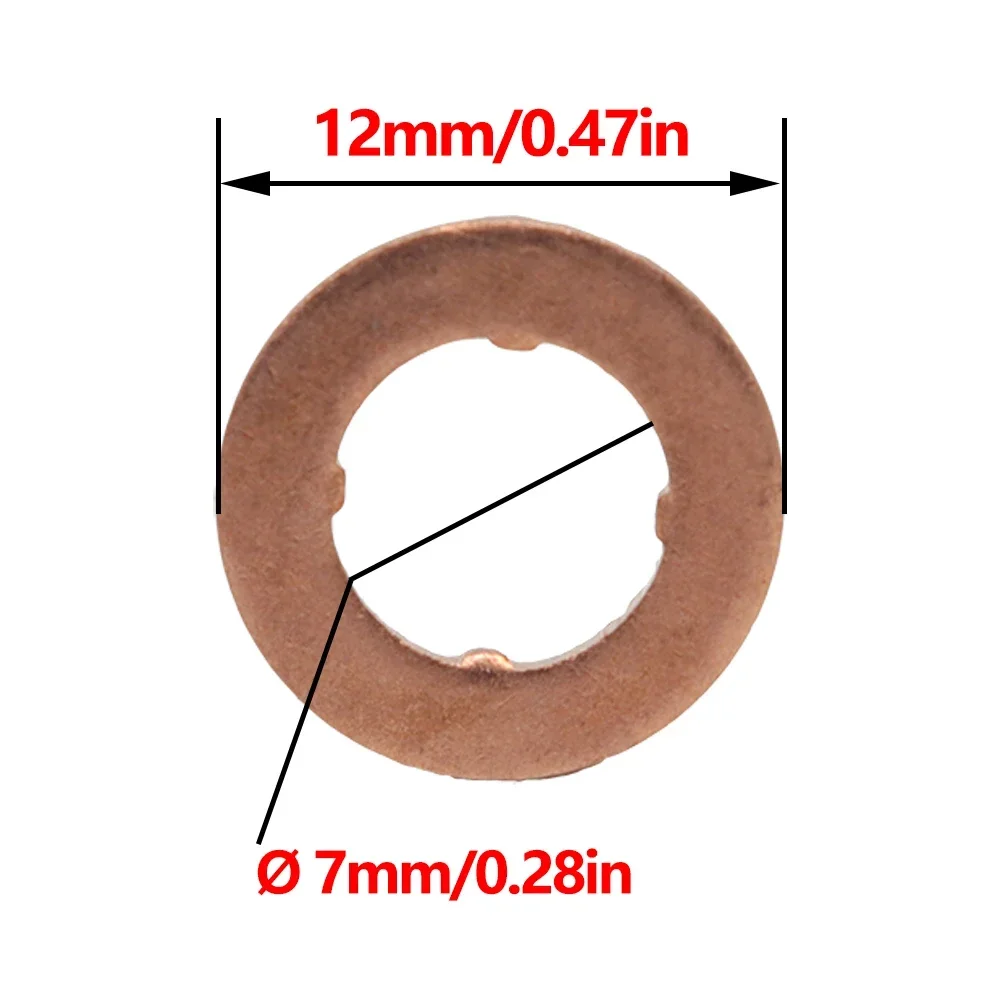
- Joints injecteurs A4 B8 : Compatibilité, référence, dimensions
- Diagnostic fuite injecteur A4 B8 : Test de retour, contrôle
- A4 B8 consommation excessive : Fuite injecteur, impact potentiel
- Réparation injecteurs A4 B8 : Coût, prix chez un garagiste
- A4 B8 et fuite gasoil: impact sur le moteur, risque, sécurité
- Problème injecteur A4 B8 : perte de puissance, voyant moteur
- Joints injecteurs à remplacer A4 B8 : Quand et pourquoi
- Injecteur A4 B8 qui goutte : causes et solutions
- Difficulté de démarrage à froid A4 B8 : fuite injecteur probable
- Moteur TDI Audi A4 B8 : Prévenir et réparer les fuites injecteurs
- Fuite injecteur A4 B8 : Risques pour le catalyseur et le FAP (Filtre A Particules)
- Tutoriel changement joints injecteurs cuivre A4 B8 : étape par étape illustré
- Problèmes injecteurs moteur 2.0 TDI A4 B8 : Solutions et astuces
- Kit joints cuivre injecteurs A4 B8 : Comparaison des différents fournisseurs
Fuite Injecteur A4 B8 ? Réparez-la VOUS-MÊME ! (Kit Joints Cuivre)
Alarme Pression Pneus INTELLIGENTE Toyota Camry/RAV4/Corolla : Sécurité Max!Oh Boy, My A4 B8 Is Weeping! (And I'm About to Get My Hands Dirty!) - DIY Injector Leak Repair
Alright, friends, let's be real. Owning a car is a rollercoaster. One minute you're cruising down the highway, feeling like a boss, the next… psshhh… you're smelling diesel fumes and your trusty A4 B8 is starting to sound like a disgruntled lawnmower. Yep, my friend, the dreaded injector leak. And guess what? We're not going to let the mechanics get their grubby (expensive) mitts on this one. We’re doing it ourselves! (Unless I mess it up, in which case… well, let's not think about that.)
H2: The Dreaded Diesel Dampness: How I Knew Trouble Was Brewing
You know that feeling? That subtle shift from "everything's fine" to "something's not quite right"? That was me, a few weeks back. The smell of diesel, like a cheap cologne my car was suddenly wearing, was the first clue. Then came the rough idling, the little shuddering dance my A4 would do at stoplights. Finally, the coup de grâce: a visible slick of black, oily gunk around… well, around the injectors. It was like a leaky faucet of automotive despair.
H3: Don't Panic! (Easier Said Than Done, Right?)
My initial reaction? Pure, unadulterated terror. Visions of skyrocketing repair bills danced in my head, accompanied by the distinct scent of burnt money. I'm not exactly a seasoned mechanic. My usual level of car maintenance involves putting air in the tires and occasionally washing the bird poop off the hood. But the internet (bless its digital heart) assured me: the injector leak? DIYable. And frankly? The thought of paying a garage a small fortune for something I might be able to do fueled a fire of stubbornness I hadn't realized I possessed.
H2: Operation: Injector Invasion! (Gathering the Supplies)
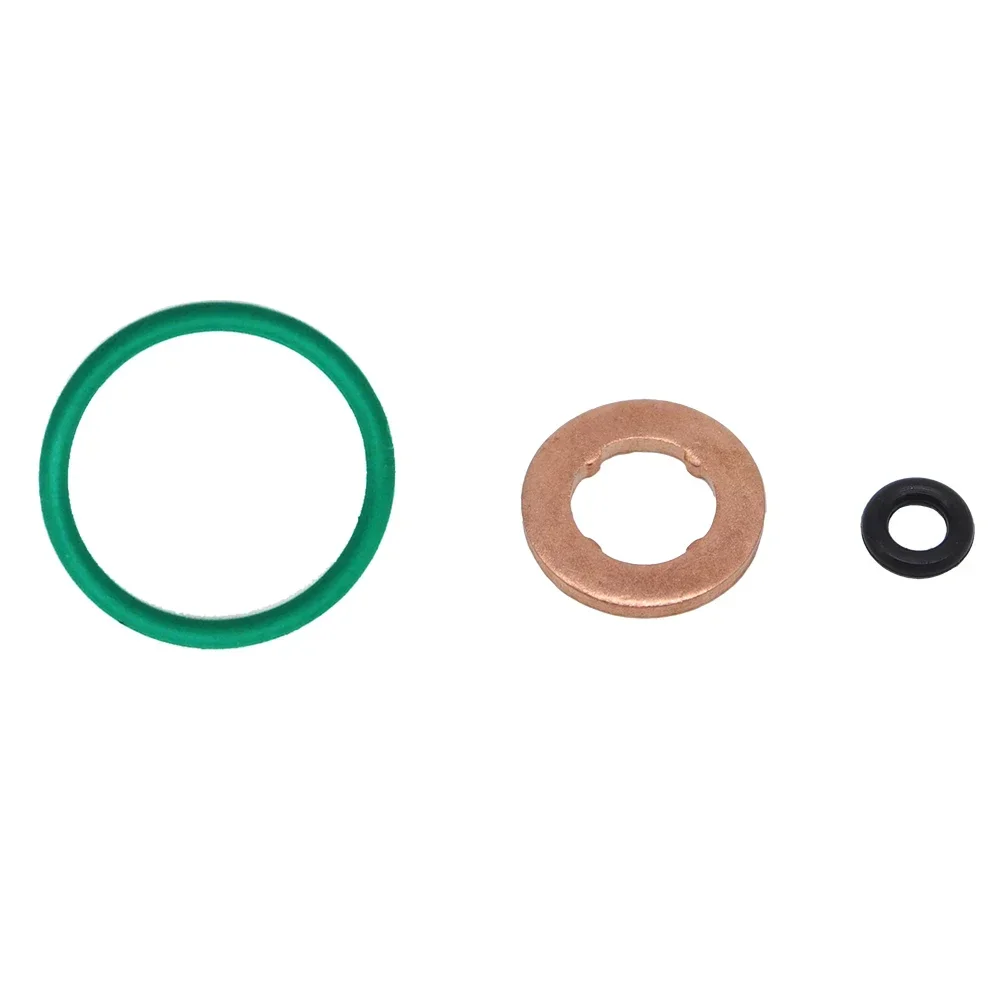
First things first: the reconnaissance. I needed to know what I was up against. Turns out, the culprit was likely those pesky copper washers (the "kit joints cuivre," as the French call them, sounding much more elegant than "copper washers"). Good news! The fix seemed straightforward. Bad news? This meant I'd be getting intimately acquainted with my engine compartment.
H3: The Shopping Spree: More Fun Than It Should Be
Naturally, this meant a trip to the auto parts store. I felt like a kid in a candy shop, except the candy was oily, greasy, and potentially engine-damaging. My list: a kit joints cuivre (duh!), a set of Torx wrenches, a torque wrench (essential!), some penetrating oil (for un-"sticking" bolts), and maybe some gloves. Oh, and a lot of patience. I knew this going in.
H3: Bonus Round Needs: (The Little Things that Help)
While I'm at it, I'll get some paper towels (because…mess). A magnetic pick-up tool (for retrieving dropped bolts, which I knew would happen). A light source (because underneath the hood is often a black hole). And, of course, several cups of coffee. This was going to be a day.
H2: The Deep Dive: Getting Down and Dirty (Literally)
Okay, time to put on my "I'm-a-mechanic-now" hat. (It's actually a baseball cap, but you get the idea). The internet video tutorials, my trusty reference guides, and a hefty dose of "fake-it-til-you-make-it" were my weapons of choice.
H3: Preparation: The Calm Before the Storm (or, the Drowning in Oil)
- Safety First, Folks! Disconnecting the battery. Check. Making sure the engine is cold (because burning yourself on hot metal is not a fun pastime). Check. Putting the car on jacks. Check. Everything ready, right?
- The Awkward Dance Around the Engine: Removing the engine cover, uncovering the area, making sure I can even see the injectors. This took some serious maneuvering. I am not a small person.
- Spray! Spray! Spray! Using penetrating oil on the bolts. Oh, the joy! I felt like I was wielding a magic potion, ready to coax those stubborn bits of metal into surrendering.
H3: The Removal: (Moments of sheer brilliance and moments of screaming)
This is where things got… interesting (and by "interesting," I mean "filled with potential for disaster").
- Removing the fuel lines: This was a delicate operation. The slightest slip could lead to… well, more fuel leaks. And I had already had enough diesel perfume for one lifetime.
- Loosening the Injectors: Those bolts! They were in there tight. I wrestled with them, grunting, sweating, and muttering under my breath. There were moments I was sure I'd strip a bolt and have to concede defeat. (I’m getting ahead of myself here.)
- The actual pulling the injectors. This really does matter. There is a special puller tool. Otherwise, you might just destroy them.
H3: The "Oh Crap!" Moment (and How I Survived):
- The Stuck Bolt: There was one bolt. One single, stubborn, refractory bolt. It refused to budge. No amount of leverage, penetrating oil, or pleading could get it moving. I spent a solid hour trying to coax it loose, and I was just about ready to throw in the towel. Then, in a moment of pure, unadulterated desperation, I tried a different angle, a different wrench… and pop! It gave way. Victory! (And a renewed appreciation for the power of persistence.)
H2: Putting it Back Together: The Reverse Engineering Blues
Okay, I got the old ones out. The replacements are in my hands. Now, to put it all back. This is where attention to detail is crucial. This is also where I almost screwed the whole thing up.
H3: Cleaning and Installing: Tiny Details, Big Consequences
- Cleaning the Injector Seats: The biggest reason for replacing those washers. This required a special cleaning tool, and it required it to be clean. I nearly skipped this step… which would have meant I'd had to start all over.
- Installing the New Copper Washers: Lining them up. Making sure they fit right. The tiniest misalignment and it's back to square one.
- Torquing Those Bolts: Ah, the torque wrench! My new best friend (even though I was pretty sure I was going to break something). Tightening those bolts to the precise specifications was the key to success. This is when I felt like a real mechanic.
H3: The Moment of Truth: Turning the Key
- The Test Start: After reconnecting everything, it was time. I took a deep breath, climbed into the driver’s seat, and turned the key. There was a moment of pure silence, then… vroom! The engine started! No diesel fumes. No rough idling. Just a smooth, satisfying hum. Success!
- The Post-Mortem: Double-checking for leaks. Making sure everything was tight. I even took it for a test drive around the block, just to be sure.
H2: Victory! (And a Few Lessons Learned)
My A4 B8 is running like a dream. I saved a chunk of money, learned a valuable skill, and gained a newfound respect for the complexity of the internal combustion engine. (And for the patience of my neighbors, who probably thought I was trying to summon a demon from under my hood.)
H3: Would I Do It Again? (Hell Yeah!)
Absolutely. It was challenging, frustrating, and at times, terrifying. But the satisfaction of knowing I fixed my car myself? Priceless. Plus, I now have a whole new vocabulary of curse words.
H3: The Moral of the Story:
- Don't be afraid to get your hands dirty.
- The internet is your friend.
- Penetrating oil is a miracle worker.
- And sometimes, a little bit of stubbornness goes a long way.
- Lastly, when in doubt, watch more videos. And maybe order your parts from somewhere closer next time.
So, if you're facing an injector leak on your A4 B8, don't panic. Grab a kit joints cuivre, roll up your sleeves, and get ready for an adventure. You might surprise yourself. And hey, if I can do it… you probably can too. Wish me luck on my next repair, friends! I'll need it.

FAQ Fuite Injecteur A4 B8 ? Réparez-la VOUS-MÊME ! (Kit Joints Cuivre) - Le Guide Désordonné !
Putain, c'est quoi cette fuite d'injecteur dans mon A4 B8 ?
Ah, la joie ! L'odeur de diesel, la fumée noire, le "tchouc tchouc tchouc" qui te prend la tête… c'est ça, la fuite d'injecteur. En gros, du diesel qui se barre là où il ne devrait pas, généralement autour des injecteurs, vers le bas de l'arbre à cames. Ça fume comme un vieux tracteur, tu consommes comme un trou noir, et ton moteur tousse comme un fumeur de 90 ans. C'est la poisse, mais ne t'inquiète pas, ça arrive à tout le monde (enfin, presque). La bonne nouvelle ? Souvent, c’est juste les joints cuivre et tu peux potentiellement le faire toi-même ! (Je dis bien "potentiellement"…)
Anecdote : Moi, la première fois, j'ai cru que j'avais le moteur en train de prendre feu. J'ai hurlé, sauté de la voiture et regardé l'arrière en mode "explosion imminente". Ensuite, j'ai remarqué la fumée qui sortait, et j'ai réalisé... C'était juste les injecteurs (heureusement!).
Pourquoi je dois changer ces satanés joints cuivre ?
Ces petits joints en cuivre, ils sont là pour faire l'étanchéité. Avec le temps, la chaleur, la pression, et peut-être une petite dose de mauvaise foi, ils se tassent, s'usent, et ne font plus leur boulot correctement. Du coup, le diesel s'échappe. C'est comme un trou dans une passoire, quoi. Et ce n'est pas bon pour la mécanique, ni pour le porte-monnaie.
L'avis de l'expert (moi, bien sûr) : C'est de la science, pas de la merde ! Les joints craquent et c'est la faute, pas celle de la gravité, elle est un ami !
Est-ce que je peux vraiment le faire moi-même ? J'suis pas mécano, moi !
Écoute, si tu as les doigts, un peu de patience, et surtout, envie de te salir les mains… OUI, tu peux ! C'est souvent plus simple qu'on ne le croit. Il y a des tonnes de vidéos sur YouTube (taper "remplacement joint injecteur A4 B8"), des tutos, des forums… Mais soit prêt à te cracher dans les mains. C'est pas toujours une partie de plaisir.
L'avertissement du pote : Si tu as deux mains gauches ou que tu galères déjà à changer une ampoule, peut-être que tu devrais laisser faire un pro. Sinon, vas-y. Mais n'oublie surtout pas de débrancher la batterie ! Et prépare-toi à la frustration.
De quoi j'ai besoin pour faire ce boulot ? Le kit joints cuivre, c'est tout ?
Fondamental : Le kit joints cuivre, évidemment. Achète-en un bon, pas du premier prix. Sinon, tu vas regretter (crois-moi !)
Obligatoire (ou presque):
- Des clés spécifiques pour dévisser les injecteurs (si tu n'as pas l'outillage… achète-le, ça te servira!).
- Une clé dynamométrique (pour serrer au bon couple, sinon, bonjour les fuites et les casses !)
- Du nettoyant frein (pour nettoyer les surfaces)
- Une brosse métallique (pour enlever la calamine)
- Des gants ! (très important, sinon tu vas ressembler à un cambouis vivant)
- Eventuellement : Un extracteur d'injecteur (si l'injecteur est collé... ça arrive ! C'est une des pires galères !)
Optionnel mais utile:
- Un chiffon propre (beaucoup de chiffons propres !)
- De quoi éclairer (une lampe frontale, c'est le top)
- De la patience (beaucoup de patience !)
Le pire truc qui peut m'arriver pendant cette opération ?
Ah, là, on entre dans les zones d'ombre... Plusieurs choses, mais la plus horrible, à mon humble avis, c'est l'injecteur coincé. Tu tires, tu forces, il bouge pas d'un poil. Tu te retrouves avec un injecteur soudé dans sa loge, une heure, puis deux, puis trois… Tes nerfs lâchent… Tu jures… Tu regrettes… Tu appelles un dépanneur… Tu payes un bras… Ça m'est arrivé. Plus d'une fois. C'est une des joies de la mécanique amateur.
Anecdote (traumatisante) : J'ai passé une après-midi entière à me battre avec un injecteur. J'ai fini par lui dire des mots doux, puis des insultes, puis… rien. Il n'a pas bougé. J'ai dû faire appel à un mécano. La honte !
Et après ? Une fois que j'ai changé ces putains de joints, quoi ?
Tu remontes tout. Tu vérifies les couples de serrage (la clé dynamométrique, souviens-toi !) Tu rebranches tout. Tu croises les doigts. Tu démarres le moteur et… tu pries pour qu'il ne fume plus. Si ça marche, tu peux te féliciter. (Et boire une bière, tu l'as mérité !)
Le conseil du pro (encore moi) : Si ça fume encore, vérifie bien que tu n'as pas oublié un joint, que les injecteurs sont bien enfoncés et serrés. Sinon, retour au point de départ. Et ne désespère pas ! La persévérance est la clé (ou pas, parfois…)
Et si ça ne marche pas ? Je suis vraiment dans la merde, là ?
Respirez. Ça arrive. Plusieurs pistes possibles :
- Les injecteurs sont peut-être morts. (C'est possible, mais rare).
- Tu as mal remonté quelque chose. (
 🚨STOP aux erreurs CANBUS ! Ampoules LED Auto 2x PLUS PUISSANTES - Garantie 0 Erreur !